Transforming Homes with Professional Painting Services • Licensed • Bonded • Insured
Transforming Homes with Professional Painting Services • Licensed • Bonded • Insured

How Many Coats of Primer on New Drywall? What You Need to Know
How many coats of primer on new drywall do you need? In most cases, one full coat of drywall primer is enough when the surface is properly finished, sanded and free of dust. A second coat may be necessary when the first coat leaves uneven absorption, exposed drywall paper, visible joint compound areas or other spots that are not properly sealed.
TL;DR
- One coat of drywall primer is typically enough for properly prepared new drywall.
- A second coat can help when the first coat leaves uneven absorption or areas that still look porous.
- New drywall needs primer because drywall paper and joint compound absorb paint differently.
- PVA drywall primer is commonly used because it helps seal the porous surface before finish coats.
- Before painting, check that the primer has dried according to the product instructions and that the wall has an even, sealed appearance.
How Many Coats of Primer on new Drywall Need?
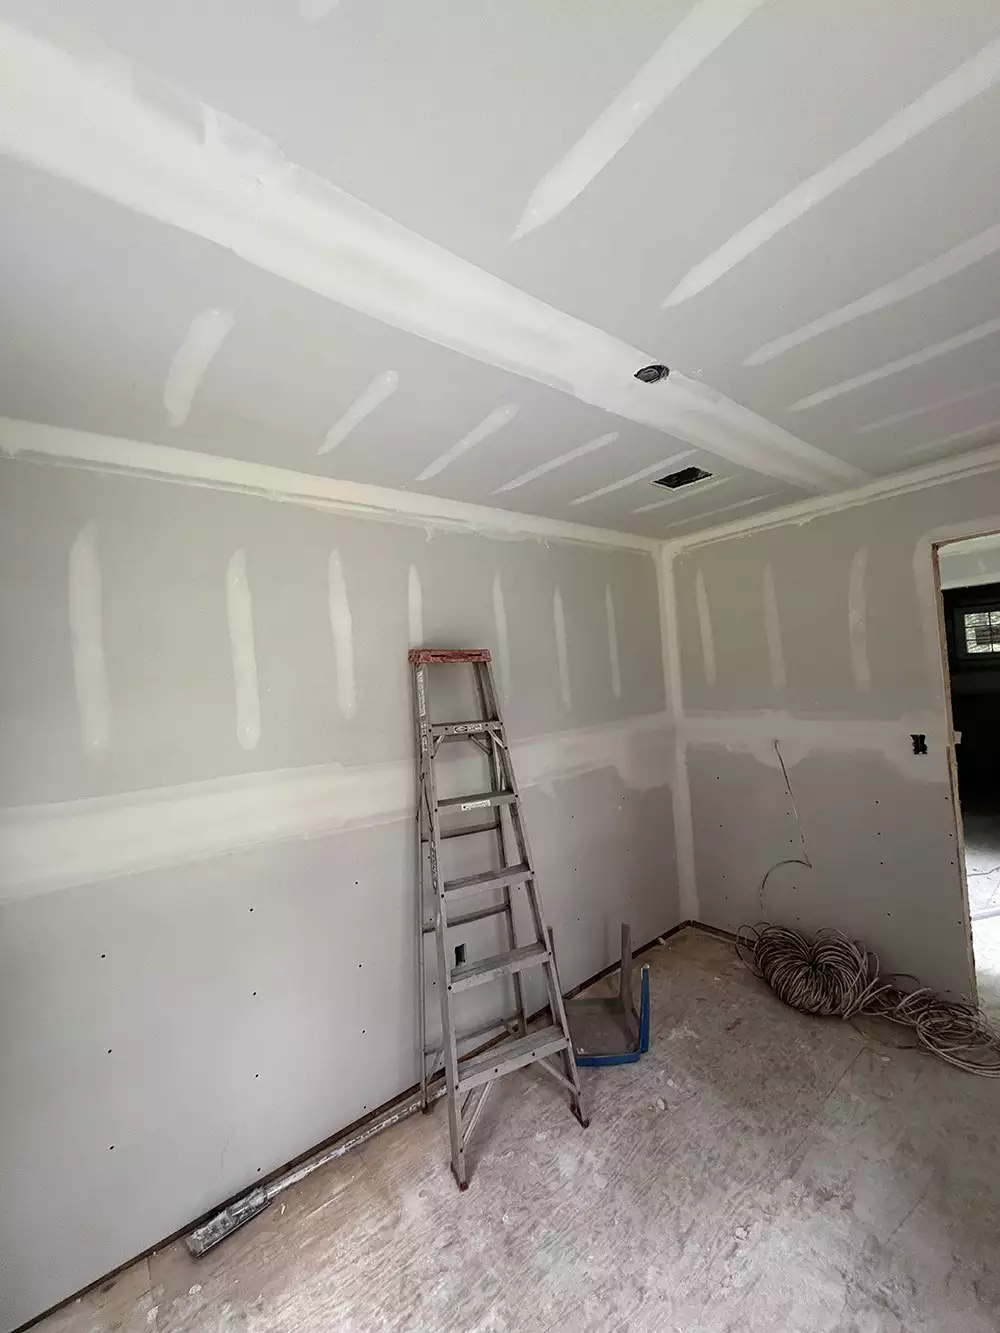
For most new drywall, one properly applied coat of primer is sufficient before applying finish paint. That answer assumes the drywall has been finished correctly. The seams and fasteners should be covered with joint compound, the surface should be sanded smooth and loose dust should be removed before priming.
The number of coats is less important than what the primer coat accomplishes. New drywall contains several different surface conditions. The paper facing may absorb primer differently than the joint compound covering seams and screw heads. If those areas remain noticeably different after the first coat, the wall may need additional primer.
A second coat is not automatically better. Applying unnecessary primer adds material and labor without necessarily improving the finished wall.
The question is: Does the first primer coat leave the drywall evenly sealed and ready for finish paint?
If yes, move on to paint. If not, correct the problem before applying the finish coat.
When One Coat of Primer Is Usually Enough
One coat will generally do the job when:
- The drywall surface is fully finished and sanded.
- Joint compound is feathered smoothly around seams and fasteners.
- The drywall is free from significant sanding dust.
- The primer is intended for new drywall.
- The primer is applied evenly rather than spread excessively thin.
- There are no areas of exposed or damaged drywall paper.
- The first coat produces reasonably consistent absorption across the wall.
A properly applied primer coat should change the surface from a highly absorbent unfinished material into a more consistent surface that can accept finish paint evenly.
You may still see some difference between the drywall paper and areas covered with joint compound. What matters is whether the surface has been sufficiently sealed for the finish coating.
When New Drywall May Need a Second Coat
A second primer coat can make sense when the first coat does not adequately seal or even out the surface. Look for specific problems rather than automatically applying another coat. A second coat may be useful when:
- Some areas still absorb primer noticeably faster than others.
- Joint compound areas remain significantly different from the surrounding drywall.
- Small areas of drywall paper remain unusually porous.
- The first coat was applied too thinly.
- Sanding or repairs were performed after the initial primer coat.
- The primer manufacturer’s instructions call for additional coverage for the intended application.
- The surface still looks inconsistent enough that finish paint would likely dry differently across the wall.
Fresh repairs can also complicate the process. If a wall was primed and then additional joint compound was used to correct a seam or imperfection, that repaired area may need to be spot primed before painting.
The purpose of the second coat is to solve a surface problem. It should not be treated as a mandatory step simply because the drywall is new.
Why New Drywall Needs Primer
New drywall is not ready for finish paint simply because it looks smooth. The surface consists primarily of gypsum covered by paper, while seams, corners and fasteners are finished with joint compound. Those materials do not necessarily absorb paint at the same rate.
That difference matters because finish paint is meant to provide the visible color, sheen and protective surface. It is not the same thing as a dedicated drywall primer. Primer helps establish a more consistent surface before the finish coats go on.
Drywall Paper Absorbs Differently
Unfinished drywall paper is porous. It can absorb water and other components from a coating more readily than a sealed painted surface.
Joint compound has its own surface characteristics. Areas with broad layers of compound can behave differently from the original drywall paper around them.
If finish paint is applied directly over these mixed surfaces, the coating can dry with differences in sheen or appearance.
This is commonly referred to as flashing. A wall may look acceptable from one angle but show dull or uneven areas when light strikes it from the side.
Primer helps reduce those differences by sealing the porous substrate before the finish paint is applied.
What Happens If You Skip Primer?
Painting directly over new drywall can produce a finish that looks inconsistent even when the paint itself is good. Potential problems include:
- Uneven paint absorption.
- Differences in sheen.
- More visible joint compound areas.
- Increased finish paint consumption.
- Uneven color appearance.
- A less uniform surface.
The problem is especially noticeable under strong natural light or directional lighting. A wall that looks fine under soft lighting can reveal differences once sunlight or overhead lighting hits it across the surface.
Using finish paint as a substitute for drywall primer also does not necessarily solve the underlying absorption problem. The first coat of finish paint may be absorbed unevenly, leaving you with more work to achieve the appearance you expected.
Looking for a Trusted Painting Team?
Planning a painting project? Bear Painters is ready to help with professional service, quality workmanship and results built to last.
What Type of Primer Should You Use on New Drywall?
A drywall primer is generally the right starting point for new, unfinished drywall. Primer products are formulated for different surfaces and purposes, so the label matters. A product intended for new drywall is a better choice than simply grabbing a general purpose primer without checking whether it is suitable for the substrate.
Two categories homeowners commonly encounter are PVA drywall primer and primer sealer products.
PVA Drywall Primer
PVA primer is commonly used on new drywall because it is formulated to help seal porous drywall surfaces before finish paint.
PVA stands for polyvinyl acetate. You do not need to understand the chemistry to choose the product, but it is useful to understand the basic job: the primer helps reduce the uneven absorption associated with unfinished drywall and joint compound.
PVA drywall primer is often a practical choice when the substrate is new and properly finished. It is not a replacement for surface preparation, however. Primer cannot hide poorly finished seams, deep sanding scratches, raised fasteners or significant surface defects.
If the drywall work is visibly uneven before priming, those problems should generally be corrected before relying on primer and paint.
Primer Sealer
A primer sealer can be useful when you need both priming and sealing characteristics from the coating.
The exact performance varies by product, so check the manufacturer’s product information for the intended surface and application.
Primer sealer can be especially relevant when the substrate contains areas that need more consistent sealing than ordinary new drywall. The right product depends on what is actually on the wall, including repairs, stains, exposed paper or other surface conditions.
How to Tell If New Drywall Is Properly Primed
You do not need specialized equipment to make a useful inspection. Once the primer has dried according to the manufacturer’s instructions, examine the wall under normal room lighting and, when possible, from several angles. Look for:
- Areas that still look unusually porous.
- Obvious differences between drywall paper and joint compound.
- Dry looking patches that appear to have absorbed the coating differently.
- Missed areas.
- Heavy ridges, roller marks or other application problems.
- Exposed drywall paper.
- Dust or debris trapped in the coating.
- Repairs that were made after the original primer application.
The wall does not necessarily need to look like a finished painted wall after primer. Primer is not the final decorative coating.
The important point is that the substrate should appear consistently sealed and ready for finish paint.
If certain areas continue to look dramatically different, investigate why before applying paint. The solution may be another coat of primer, additional sanding, dust removal or a drywall repair rather than simply adding more material.
Looking for a Trusted Painting Team?
Planning a painting project? Bear Painters is ready to help with professional service, quality workmanship and results built to last.
How to Prime New Drywall Correctly
Getting the first coat right can eliminate the need for unnecessary additional coats.
1. Prepare the Surface
Make sure drywall seams, corners, screw or nail heads and repairs have been properly finished. Sanding should leave the surface smooth without excessive ridges or visible compound buildup. Primer will seal the surface, but it will not reliably correct poor drywall finishing.
2. Remove Sanding Dust
Sanding creates fine dust that can interfere with primer adhesion and produce a rough surface. Remove loose dust before priming. Use a method that cleans the surface without leaving it excessively wet. The drywall should be clean and dry before the primer is applied. Pay particular attention to horizontal surfaces and corners where sanding dust can collect.
3. Apply the Primer Evenly
Follow the primer manufacturer’s instructions for application and coverage. The objective is an even coat, not an extremely thick layer. Excessive primer does not automatically produce a better surface.
Use the application method recommended for the product. Work systematically so areas are not missed or left with significantly different film thicknesses.
On larger walls, maintain a wet working edge as recommended by the product instructions to help produce a consistent application.
4. Allow the Primer to Dry
Do not judge the surface immediately after application. Primer can look different while wet than it does once dry. Drying time varies with the product and environmental conditions such as temperature, humidity, ventilation and substrate condition.
Follow the manufacturer’s stated recoat requirements rather than relying on a universal number of hours.
5. Inspect the Surface
Once the primer is ready for inspection, look for uneven absorption, missed areas, exposed paper or drywall imperfections. This is where you decide whether another primer coat is actually necessary. If the surface is properly sealed and consistent, there may be no reason to apply another coat.
6. Apply Additional Primer Where Needed
A second full coat may be justified if the first coat has not produced adequate sealing or if repairs have changed the surface.
In some cases, only a repaired area needs additional primer. In others, a complete second coat may provide a more consistent result. The decision should be based on the condition of the wall and the primer manufacturer’s instructions.
7. Apply Finish Paint
Once the primer is properly dry and ready for recoating, apply the finish paint according to its label.
Finish paint provides the final color and sheen. The number of finish coats depends on the paint, color, application, substrate and desired result. Do not assume that adding more primer eliminates the need for the proper number of finish coats.
Common Mistakes When Priming New Drywall
1. Skipping Surface Preparation
Primer is not a substitute for drywall finishing. If seams are poorly feathered or sanding scratches are obvious, those defects can remain visible after painting. Fix the surface before expecting primer to produce a smooth looking result.
2. Applying Primer Over Excessive Dust
Dust can interfere with the coating and leave the surface gritty. Even a good drywall primer cannot perform properly if loose sanding dust is sitting between the substrate and the coating.
3. Using the Wrong Primer
Not every primer is intended for unfinished drywall. Check the label to make sure the product is suitable for the surface. If you are using a specialty coating or an unusual substrate condition, verify compatibility with the manufacturer’s technical information.
4. Assuming More Coats Are Always Better
Two coats are not automatically better than one. If the first coat has properly sealed the drywall, another coat may provide little practical benefit. Additional coats make sense when they address a specific issue.
5. Painting Before the Primer Is Ready
Primer needs to dry and cure enough for the finish coat according to the product instructions. Applying paint too early can affect how the finish coat behaves. Temperature, humidity, airflow and the specific product all influence drying.
6. Ignoring Uneven Absorption
This is one of the more important things to catch before finish painting. If the wall still contains noticeably different levels of porosity, the finish coat may reveal those differences. Take care of the surface before moving forward rather than hoping the paint will hide the problem.
Looking for a Trusted Painting Team?
Planning a painting project? Bear Painters is ready to help with professional service, quality workmanship and results built to last.
Primer vs Paint on New Drywall
Primer and finish paint serve different purposes. Primer prepares the substrate. On new drywall, that means helping control absorption and creating a more consistent surface for the finish coating.
Finish paint provides the visible coating. It supplies the color and selected sheen and forms the finished appearance of the wall.
Think of primer as preparing the wall for paint rather than simply being a cheaper version of paint. This distinction matters because a wall can have plenty of paint on it and still have an uneven appearance if the underlying drywall was not properly sealed.
The finish paint also cannot reliably compensate for every drywall defect. Deep sanding marks, poorly finished seams, damaged paper and uneven joint compound may still show after several coats. Good results start with the substrate.
Do Drywall Repairs Need Primer?
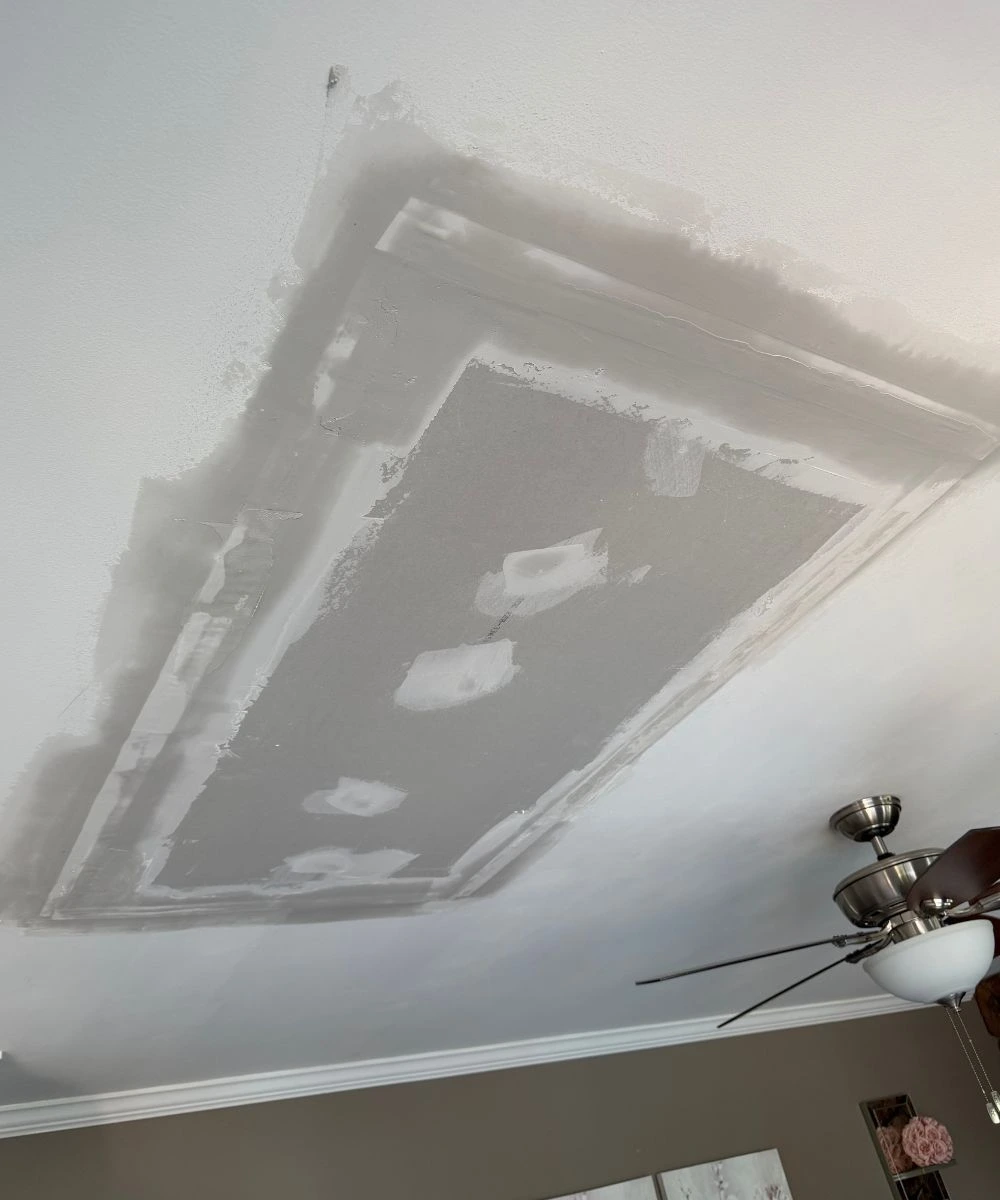
Yes, repaired drywall generally needs to be primed before finish paint. A repair creates a new surface condition within an otherwise painted or primed wall. Joint compound and exposed drywall can absorb paint differently from the surrounding surface.
For a small repair, spot priming may be enough. Larger repairs or extensive areas of new joint compound may require broader primer coverage.
The key is to avoid leaving a highly porous repair surrounded by an already sealed surface and then expecting the finish paint to make the difference disappear.
If the repair is substantial, inspect the transition between the repaired area and the surrounding wall before painting.
How Long Should Primer Dry Before Painting?
There is no single drying time that applies to every drywall primer. The manufacturer’s instructions should control. Drying and recoat times can change with:
- Temperature
- Humidity
- Ventilation
- Primer type
- Application thickness
- Surface porosity
A primer can feel dry to the touch before it is ready for the next coating. Follow the product’s specified recoat instructions rather than using touch alone as the test.
Conclusion
If you’re trying to determine how many coats of primer on new drywall you actually need, start with one good coat rather than assuming two are required.
Prepare the drywall properly, remove sanding dust, use a primer intended for the surface and apply it evenly. Once it has dried, inspect the wall. If the surface is consistently sealed and ready for finish paint, move forward. If certain areas remain porous or visibly inconsistent, determine whether another primer coat or additional surface preparation is the better solution.
That approach avoids both common problems: under priming a porous surface and applying unnecessary coats simply because the drywall is new.
For homeowners who want the preparation and coating process handled as part of a larger painting project, Bear Painters can help assess the drywall condition and determine what preparation is needed before finish paint. Bear Painters can also address the primer stage as part of a complete interior painting project when the walls require more than simply applying color.
About
Bear Painters provides residential painting services in Walden, NY, and throughout Orange County. We specialize in interior painting, exterior painting, drywall repair and surface prep for homes, offices, retail spaces, rentals and more.